

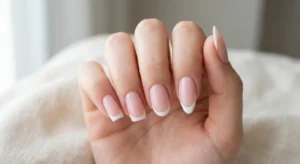
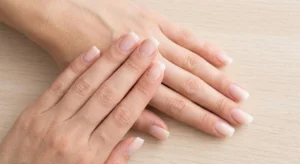
Learning how to shape your nails changes everything. A simple color looks different on square nails versus almond nails. One style feels sharp and modern. The other feels soft and long. Your nail shape frames every manicure you wear. It is the most important part of your nail care routine.
And yet most people default to whatever shape they grew up with and never think twice about it.
Here’s something worth knowing before you pick up a file: almond nails have over 4.1 million combined Instagram and TikTok posts, more than any other nail shape, and consistently hold the highest Google search interest globally, peaking at 89 out of 100 in December 2024. According to celebrity manicurists Hang Nguyen and Julie Kandalec, almond is the standout shape of this era. It elongates the finger, works beautifully with nail art, and flatters almost every hand type.
This guide covers how to shape your nails into every popular shape, with almond getting the deep dive it deserves. One read, and you’ll know exactly what to do.
What You Need Before You Start
Three things:
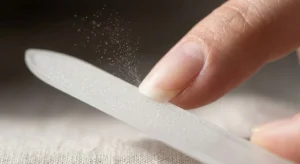
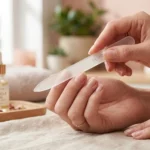
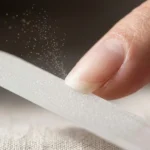
A glass nail file (180–240 grit). Glass seals the nail edge as it files rather than tearing it. For shaping specifically, 240 grit gives you control. 180-grit removes length faster. Not sure which file to use? Read our full Nails Correctly guiHow to File Yourde.
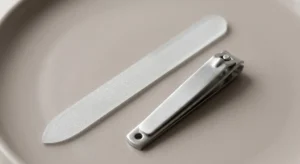
Sharp nail clippers. For reducing the length before shaping. A file alone shouldn’t do this job; it stresses the nail plate unnecessarily.
Dry, clean nails. Wet nails tear instead of filing cleanly. Wait at least 20 minutes after any water exposure before shaping.
Which Nail Shape Is Right for You?
Before learning the technique, choosing the right shape saves a lot of frustration. Here’s the honest breakdown:
| Shape | Best For | Minimum Length |
|---|---|---|
| Round | Short nails, low maintenance, wide nail beds | Short |
| Square | Clean/minimalist look, strong nails, any length | Short–Medium |
| Oval | Elongating effect, versatile, everyday wear | Medium |
| Almond | Most flattering, finger-slimming, nail art | Medium–Long |
| Squoval | Square look without sharp corners, universally flattering | Short–Medium |
Wide nail beds look best with almond or oval ,the tapered tip draws the eye inward and makes fingers appear slimmer. Narrow nail beds suit square or round, which adds visual width. Short fingers benefit most from almond or oval, which create the illusion of length. Active hands that take daily wear, round or square are the most practical.
How to Shape Your Nails: Every Shape Explained
How to Shape Round Nails
A round is the most forgiving shape ,and the easiest to maintain. It works at almost any length and requires minimal filing.
Step 1. Trim nails to your desired length with clippers, cutting straight across.
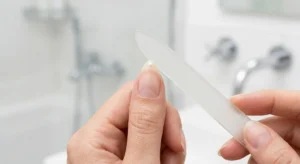
Step 2. Hold the file at a slight angle on the left side of the nail. File from the outer corner toward the center in one smooth stroke. Repeat on the right side.
Step 3. The goal is to match the natural curve of your fingertip. Look at the nail from the side ,the tip should smile upward in a gentle arc.
Step 4. Finish with a 280-grit buffer along the edge, then apply cuticle oil.
Common mistake: Over-rounding into an oval without meaning to. If that keeps happening, use shorter strokes and check the shape more frequently.
How to Shape Square Nails
Square is the most structurally strong shape ,flat top, straight sides, minimal corners at risk of snagging. Ideal for anyone with naturally strong nails who prefers a clean, modern look.
Step 1. Trim straight across with clippers to your desired length.
Step 2. File straight across the top of the nail in one direction to smooth the flat edge. Don’t angle the file; keep it parallel to the nail tip.
Step 3. File each side straight down, keeping the sidewalls parallel. Very little shaping needed here, just smoothing.
Step 4. Lightly soften the two top corners with one or two strokes of the file at a 45-degree angle. This prevents snagging without rounding into squoval territory.
Common mistake: Rounding the corners too much and accidentally creating squoval. If you want a true square, barely touch the corners.
How to Shape Oval Nails
Oval is the shape that flatters almost everyone. It elongates the finger, looks elegant at medium length, and is softer than almond without requiring as much precision.
Step 1. Trim to slightly longer than your target length to give yourself room to shape.
Step 2. File each side of the nail at a slight inward angle, curving toward the center of the tip. Think of drawing the sides of an egg.
Step 3. File across the top in a continuous curved motion, not a straight line. The tip should be rounded, not peaked.
Step 4. Hold the nail at eye level and look straight down from above. The shape should look like an elongated half-circle. Adjust any asymmetry before buffing.
Common mistake: Creating an almond peak by filing the sides too aggressively. Oval has a rounded tip. Keep checking from above and stop before the tip narrows to a point.
How to Shape Almond Nails (Full Step-by-Step)
Almond is the most popular nail shape in the world right now, and the most technical to get right. The difference between a beautiful almond and a lopsided mess is almost entirely about symmetry and patience.
Here’s what an almond actually looks like: wide at the base, narrowing toward the tip, ending in a softly rounded point. Not sharp like a stiletto. Not as blunt as oval. Right in between, like, yes, an actual almond.
What you need: Medium to long nail length. Almond is very difficult to achieve on short nails. If your nails are too short, oval is the more flattering alternative while you grow them out.
Step 1: Mark your peak. Use a nail pen, white polish, or even a small dot of regular polish to mark the exact center of the nail tip. This is your target peak; every filing stroke aims toward this point. This single step is what separates clean almond nails from uneven ones.
Step 2: Shape the sides with clippers first. Use straight-edged clippers to clip each side of the nail diagonally toward the center mark. You’re creating a rough triangular shape, not filing to a point, just removing the bulk so the file has less work to do. Cut less than you think you need to.
Step 3: File the left side. Hold the file on the left side of the nail at an upward angle. Starting from the outer corner, file in one direction toward the center peak mark. Use light, deliberate strokes. Don’t rush.
Step 4: File the right side. Repeat on the right side, same motion, same angle, same number of strokes. Symmetry is everything. Match the left side exactly before moving on.
Step 5: Round the tip. The tip of an almond shape is not a sharp point; it’s softly rounded. Once both sides taper in, run the file lightly across the very tip to soften the peak into a gentle curve. This is what makes it look like an almond rather than a stiletto.
Step 6: Check from every angle. Look straight down from above. Look from the side. Flip your hand and look from underneath. Any asymmetry shows up in at least one of these views. Fix now rather than after buffing.
Step 7: Buff and finish. One pass of a 280-grit buffer seals the edge. Apply cuticle oil immediately. Your nails will look noticeably more polished even before any color goes on.
What Are Round Almond Nails?
Round almond nails, sometimes called “soft almond”, sit between a traditional almond and an oval. The sides taper inward like an almond, but the tip is rounder and less pointed. It’s a softer, more natural-looking version of the almond shape that works at slightly shorter lengths and requires less precision.
If you love the elongating effect of an almond but find the traditional technique too fiddly, a round almond is the shape to aim for. Follow the almond steps above, but in Step 5, round the tip significantly more, aiming for a wider curve rather than a subtle peak.
How to Shape Squoval Nails
Squoval, square plus oval,is the universally flattering compromise. Flat top like square, softened corners like an oval. It suits almost every hand shape and length, and is significantly easier to maintain than almond.
Step 1. Trim straight across with clippers.
Step 2. File the top straight, same as square.
Step 3. On each top corner, file a smooth, rounded curve ,one continuous stroke connecting the side to the top edge. The corner disappears, but the flat top stays.
Step 4. Check from above. The shape should look like a square with the corners melted off. Buffer and finish with cuticle oil.
How to Maintain Your Nail Shape
Getting the shape right is one thing. Keeping it requires a weekly habit.
File lightly once a week ,even if nothing looks wrong. Weekly maintenance catches minor asymmetry and snags before they grow into a full reshape session. Use a glass file, one direction, two or three light strokes per side.
For almonds specifically, the tip is the first thing to change as the nail grows. A tiny weekly touch-up keeps the taper consistent without needing to redo the full shape every time.
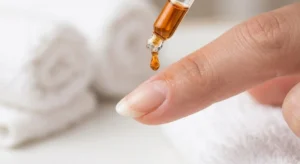
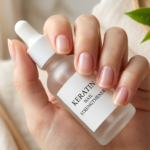
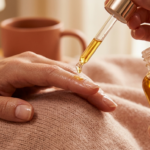
Apply cuticle oil after every filing session. Filing removes surface moisture,oil replaces it, and keeps the nail plate flexible, which means fewer cracks and breaks between sessions.
Frequently Asked Questions
How do you shape nails into almond at home?
Mark the center of your nail tip as your target peak. Clip the sides diagonally toward that point to rough-shape. File both sides from the outer corner toward the peak in one direction, matching strokes on both sides for symmetry. Round the tip gently ,not to a sharp point. Check from above, side, and underneath before buffing.
How long do nails need to be for almond shape?
At minimum, your nail should extend a few millimeters past the fingertip. Mid-length is ideal ,celebrity manicurist Hang Nguyen specifically recommends mid-length almond for the most flattering result, especially on shorter fingers. Very short nails won’t hold the almond taper and will look more oval or round.
What’s the difference between almond and round almond nails?
Almond has a more defined taper and a subtly pointed peak. Round almond (soft almond) has the same narrowing sides but a wider, more rounded tip, closer to oval but with the elongating taper of an almond. Round almond works at slightly shorter lengths and is easier to maintain.
What nail shape makes fingers look longer?
Almond and oval shapes consistently lengthen the appearance of fingers by drawing the eye toward the narrowing tip. Celebrity manicurist Julie Kandalec specifically recommends almond oil for shorter fingers. Avoid a square on short fingers, it visually shortens the finger further.
How often should I reshape my nails?
A full reshape every two to three weeks, with light weekly maintenance filing in between. Nail growth shifts the shape gradually, catching it early with weekly touch-ups means you rarely need to do a complete reshaping session from scratch.
Final Thoughts
Shape is the foundation of every manicure. Get it wrong, and even the best polish looks off. Get it right, and even bare nails look intentional.
Almond dominates for a reason: it elongates, it flatters, and it makes nail art look better. But the right shape is ultimately the one that works for your nail length, lifestyle, and hand shape. Use the guide above to find yours, learn the technique once, and the rest becomes a 10-minute weekly habit.
The tools, the direction, the symmetry, it all comes down to consistency. Show up for it weekly, and your nails will show for it.
Basics are just the start. Acrylic nails need extra care. You must protect your natural nails underneath. Keep them strong and healthy. Read our full guide on Acrylic Nail Care: Keep Your Natural Nails Healthy. Get expert tips to save your nail beds now.


1 thought on “How to Shape Your Nails: 2025 Guide”