
You probably file your nails like a teenager. You go back and forth in quick strokes. It is fast, but it is harmful. This sawing motion causes splits and peeling. Most people blame their genetics. However, the secret is learning how to file your nails correctly. Filing in one direction prevents micro-tears. It stops your nails from breaking. This simple change will save your manicure.
Here’s what actually happens: filing back and forth creates micro-tears along the nail edge. Those tears don’t seal; they spread. According to nail health researchers, incorrect filing technique, specifically the back-and-forth motion, is responsible for the majority of nail edge splitting cases in people with otherwise healthy nails. It’s not your diet. It’s not your genetics. It’s the 30-second habit you’ve had since you were twelve.
Learning how to file your nails correctly takes the same amount of time. You just need the right tool, the right grit, and one technique change. This guide covers all of it.
Step 1: Pick the Right Tools for How to File Your Nails Correctly
The tool matters just as much as the technique. Most people reach for whatever’s in the bathroom drawer, and that’s usually the problem.
Emery Boards, Cheap but Damaging
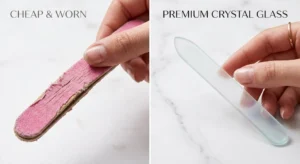
Emery boards are what most of us grew up using. They’re cheap, easy to find, and they get the job done, sort of. The harsh grit leaves rough, jagged edges that tear nail tips and start the split-and-peel cycle. Use one regularly, and your nails never quite recover between sessions.
They also wear out after one or two uses. You’re often filing with a board that’s already past its useful life and doesn’t even know it.
Glass Nail Files, The Smarter Switch
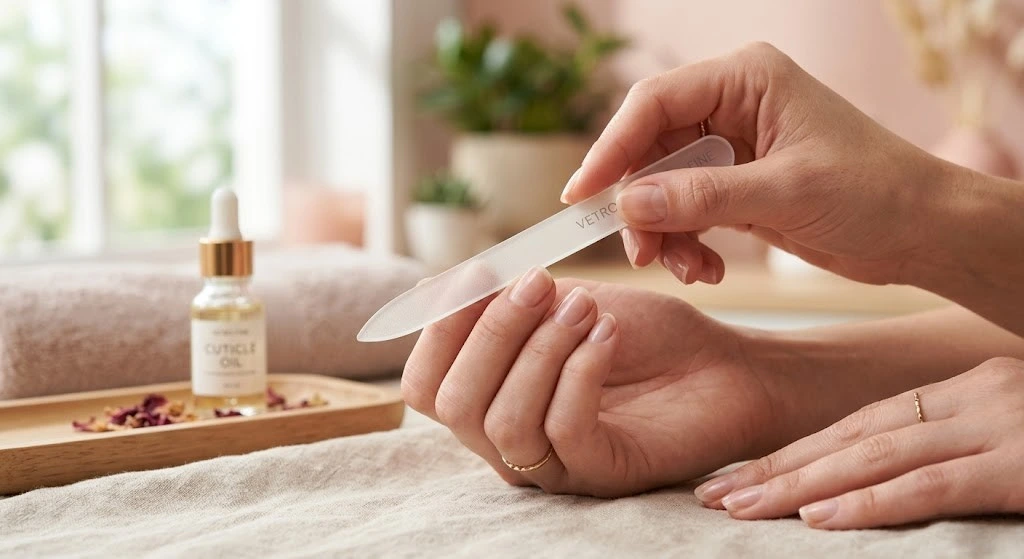
This is where things change. A glass nail file seals the keratin layers together at the nail edge as it files, instead of tearing them apart. The result is a smoother edge, less splitting, and nails that hold up significantly longer between manicures.
Board-certified NYC dermatologist Dr. Orit Markowitz puts it plainly: repeated trauma from incorrect filing can impact the nail bed, and that damage can be irreversible. She recommends tools like glass nail files precisely because they’re less likely to cause that kind of harm.
Glass files cost $10–20. They lasted years. They’re washable. For anyone dealing with chronic breakage, this one swap fixes more than most treatments ever will.
Grit Guide: Which Number Do You Need?
Grit tells you how coarse the file is. Lower number = rougher surface. Here’s what actually matters for natural nails:
| Grit | Best For |
|---|---|
| 100–150 | Acrylic and gel extensions only, never natural nails |
| 180 | Natural nails, heavier shaping, and reducing length |
| 240 | Natural nails, refining shape, smoothing edges |
| 280–320 | Buffing and finishing after filing |
For home use on natural nails, 180 to 240 is the range you want. Anything lower causes real damage. Anything higher won’t shape efficiently.
Step 2: Prep Before You File
Two non-negotiables before the file touches your nail:
Always file dry nails. Wet nails are softer; they tear instead of filing cleanly. Even 10 minutes after washing your hands, moisture remains in the nail plate. Wait longer than you think you need to.
Trim first, file second. A nail file shapes nails; it doesn’t shorten them. If you need to reduce a significant length, use sharp clippers first. Then use the file to shape what’s left. Trying to shorten with a file alone stresses the nail plate and wastes time.
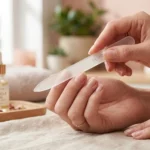
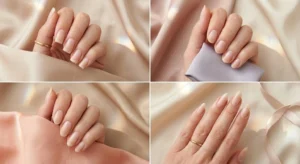
Step 3: The Best Technique for How to File Your Nails Correctly
This is where most people go wrong, and where most tutorials stop short of being actually useful.
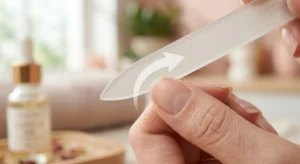
Hold the file at a slight upward angle under the nail tip. Not flat against the nail surface. Angled slightly upward, so you’re filing the edge rather than scraping across the top of the nail plate.
Divide the nail mentally into two halves.File the left side first, moving from the outer corner toward the center. Then the right side, same motion, outer corner toward the center. This builds symmetry naturally and stops you from over-filling one side.
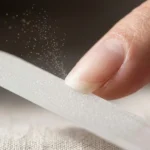
One direction only, always.Outer edge to center, never back and forth. This is the single most important rule in nail filing. The back-and-forth sawing motion is what creates micro-tears. Stop it entirely.
Light pressure. Let the file do the work. Pressing hard generates heat, which damages the nail plate. Short, light strokes beat long, forceful ones every time.
Check the shape as you go. Hold your hand up at eye level and look straight down the nail from above. This angle shows the shape more accurately than looking at it head-on. Adjust before you’ve filed too far.
Finish the edge. Once you’re happy with the shape, run the file once lightly along the underside of the nail tip. This removes leftover filings and smooths any micro-roughness the main filing left behind.
How to Use a Glass Nail File, What’s Different
Glass files work on the same principle, one direction, outer edge to center, but with a few key differences worth knowing.
Use lighter pressure than you think. Glass cuts more efficiently than emery. The same stroke removes more material, so less force is needed. Start lighter and work up rather than bearing down from the start.
File weekly, not just when nails break. Weekly light maintenance keeps the shape consistent and means you never have to do heavy corrective shaping in one session. It also catches snags before they turn into splits.
Clean after every single use. Wash with soap and water, or wipe with rubbing alcohol. Glass files don’t harbor bacteria the way emery boards do, but only if you clean them. A dirty file performs worse and defeats the hygiene advantage entirely.
Keep it in its sleeve. Glass files are durable, but they snap on hard floors. Most come with a protective case. Use it every time, replacing a $15 file because it broke on the bathroom tiles is entirely avoidable.
Step 4: Match Your Filing Direction to Your Shape
The angle and direction you file determines the shape you get. Every shape has a specific filing pattern, and most people don’t realize the technique changes depending on which shape they’re going for.
Square: File straight across the top only. Keep the sides parallel and don’t touch the corners. Strong, clean, and easiest to maintain.
Round: File both outer corners toward the center, curving them to follow the natural arc of your nail base. Best for shorter nails.
Oval: File the sides at a slight inward angle first, then smooth across the top. More elongated than round. Universally flattering.
Almond: File both sides toward a narrower center point to create a tapered tip. The most popular shape right now, and the trickiest to get symmetrical. It needs more length and a more deliberate technique than the others.
👉 For a full step-by-step breakdown of every shape, especially almond, read our How to Shape Your Nails guide.
Common Nail Filing Mistakes (And the Fixes)
Filing wet nails. The most common mistake. Nails hold moisture longer than skin does ,wait at least 20 minutes after any water exposure before filing.
Sawing back and forth. If you catch yourself doing this mid-session, stop. Reposition. Start the stroke again from the outer edge. One direction, every time.
Wrong grit for natural nails. Anything below 180 grit is designed for acrylics and gel extensions. On natural nails, it removes too much material too fast. Check the packaging before you buy.
Over-filling the sidewalls. The sides of the nail need very little attention. Most shaping happens at the tip. Filing aggressively into the sidewalls thins the nail at its structural base and leads to breakage higher up.
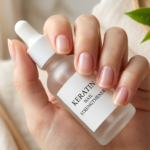
Skipping the buffer. After shaping, one pass with a 280–320 grit buffer seals the nail edge and creates a smooth surface for polish to grip. This step is what separates a polished salon result from a rough DIY finish.
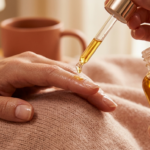
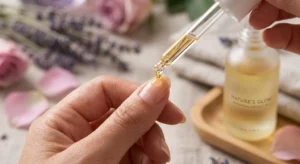
No cuticle oil after filing. Filing removes surface moisture from both the nail and the surrounding skin. Apply cuticle oil immediately after every session; it takes 30 seconds and makes a real difference to how the nail holds up over the following days.
Frequently Asked Questions
How to use a nail file step by step?
Hold the file at a slight upward angle under the nail tip. Divide the nail into two halves mentally. File the left side from the outer corner to the center, then repeat on the right. Always move in one direction, never back and forth. Use light pressure. Check the shape by looking straight down the nail from eye level. Finish with one light pass along the underside of the tip, then apply cuticle oil.
How do you use a nail file for beginners?
Start with dry nails and a 240-grit file. Hold it at a slight upward angle under the nail tip. Move from the outer edge toward the center, one direction only. Light pressure, short strokes. Check the shape by looking straight down from eye level. Finish with a buffer and cuticle oil. That’s it.
How to use a glass nail file correctly?
Same one-direction technique as any file, but with noticeably lighter pressure. Glass cuts more efficiently than emery; you need less force for the same result. Clean with soap and water after every use. Store in its sleeve. File weekly rather than waiting for a break or snag.
How often should you file your nails?
Once a week for maintenance is ideal. More frequent filing removes too much material over time. For a snag or rough edge between sessions, spot-file that one nail only rather than doing a full session.
What grit nail file should I use for natural nails?
180 for heavier shaping or length reduction. 240 for refining shape and smoothing edges. Never go below 180 on natural nails; lower grits are designed for acrylics and will thin and damage natural nail plates over time.
Final Thoughts
Here’s the honest summary: one direction, dry nails, right grit, light pressure. That’s the entire technique. It takes no more time than doing it wrong; the only difference is what your nails look like a week later.
If you take one thing from this guide, make it the glass file switch. It fixes the tool problem before the technique even comes into play. Most people who struggle with chronic splitting and peeling see a noticeable difference within two weeks of making that one change.
Get the filing right and everything else, polish adhesion, nail strength, manicure longevity, improves without any extra effort.
👉 Ready to go further? Learn How to Shape Your Nails, a full guide to every popular shape, including almond, oval, square, and round.