
Gel Nail Care Tips can turn your manicure into one of the best beauty investments you’ll ever make. However, without the right approach, they can quickly start lifting, peeling, or quietly destroying your natural nails underneath.
Here’s the thing most people don’t realize: the gel polish itself isn’t usually the problem. It’s what happens before and after the appointment that determines whether your nails come out stronger or thinner on the other side.
These gel nail care tips cover everything: prep, aftercare, removal, and what to do between appointments, so your manicure lasts longer, and your natural nails stay genuinely healthy underneath.
What Gel Polish Actually Does to Your Nails
Before the tips, it helps to understand what you’re working with.
Gel polish is made up of molecules that bond together under UV or LED light during the curing process. Unlike classic nail lacquer, gel polish is sealed, hardened, and chip-resistant in a way that regular polish simply can’t match, which is why a proper gel manicure typically lasts two to three weeks with normal wear.
But that same strength has a tradeoff. Beyond nail brittleness and peeling, a 2023 UC San Diego study found that chronic use of UV nail polish dryers leads to cell death and cancer-causing mutations in human cells, and a 2024 study calculated that one gel manicure session exposes your hands to UV equivalent to roughly three to six minutes of midday summer sun. That adds up with regular visits.
The good news? Every one of those risks is manageable with the right habits, and most of the damage people experience has nothing to do with UV at all. It comes from poor aftercare and incorrect removal.
Before Your Appointment: Prep That Protects
1. Come In With Clean, Product-Free Nails
The most important thing you can do before a gel appointment is show up with clean nails, no old polish residue, no oil, no lotion. A smooth, oil-free surface ensures better gel adhesion and is the single biggest factor in how long your manicure will actually hold.
Wash your hands thoroughly, remove any existing polish, and skip the hand cream on appointment day. You can moisturize immediately after, but not before.
2. Tell Your Technician About Any Nail Issues
If you have thin nails, a history of lifting, or sensitivity to UV light, say so before they start. Being proactive with your manicurist helps them adjust their technique, choose the right products, and prep your nails correctly. A skilled technician will always welcome that information.
3. Protect Your Skin During UV Curing
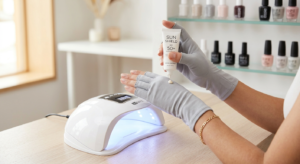
This one is often skipped entirely. The UV lamp used to cure gel polish also exposes the skin on your hands to ultraviolet light. Apply a broad-spectrum SPF to the backs of your hands before your appointment, or ask your salon if they have UV-protective gloves with the fingertips cut out. Small habit, real protection.
After Your Appointment: The Critical First 24 Hours
The first day after a gel manicure is when the polish is most vulnerable, and most people don’t know that.
4. Avoid Heat and Hot Water Immediately After
Skip the long hot shower, the steam room, or any prolonged hot water exposure for the first 24 hours. Heat softens the gel before it has fully hardened and bonded to the nail, which leads to early lifting at the edges.
When you do wash your hands, use lukewarm water and dry thoroughly. This one habit alone can add days to the life of your manicure.
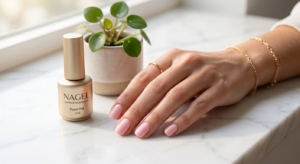
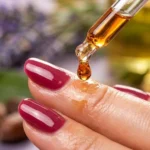
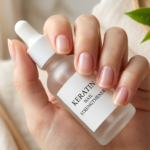
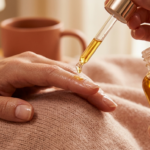
5. Apply Cuticle Oil From Day One
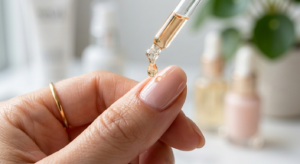
Cuticle oil not only moisturizes your cuticles and surrounding skin, but it also helps to seal in the color and protect your nails from chipping. Start this on the same day as your appointment.
Here’s something most people don’t know: gel polish is slightly porous. Massaging a cuticle oil or conditioning treatment into your nails and the surrounding skin several times a day will stimulate nail growth and promote stronger, healthier-looking nails, even through the gel. That means you can actively moisturize your natural nail while the gel is still on.
Make it a daily habit, not an occasional one.
During the Wear Period: Habits That Make It Last
6. Wear Gloves for Every Cleaning Task
Water and chemicals are the archenemies of gel nails. Every time your hands soak in hot water or come into contact with cleaning products, the gel seal weakens at the edges, creating gaps where moisture and bacteria can get trapped.
Keep a pair of rubber or nitrile gloves under the kitchen sink. This simple habit is the number one reason some people’s gel manicures last three weeks while others barely make it to ten days.
7. Never Use Your Gel Nails as Tools
Using nails as tools, opening cans, peeling stickers, or scratching surfaces creates pressure that causes cracks and chips. The stress fractures that result don’t just ruin the polish; they damage the natural nail underneath the gel.
Use the pad of your finger, a coin, or an actual tool. Your gel nails will thank you for it.
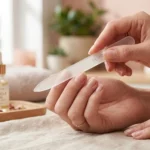
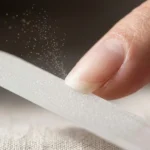
8. File Chips Gently — Don’t Peel
If a small chip or snag appears, resist the urge to peel it off. Even a small peel removes layers of the natural nail with it. Instead, gently smooth the edge with a fine-grit file to stop the crack from spreading, then apply a thin layer of clear top coat over it.
This buys you days, sometimes another full week, before you need a new appointment.
Removal: The Most Important Gel Nail Care Tip of All
Removal is where most nail damage actually happens. Not from the gel itself — but from removing it incorrectly.
9. Never Peel or Pick Off Gel Polish
Picking or peeling off chipped or peeling gel polish can cause significant damage to your natural nails. Picking can also lead to lifting, and bacteria and dirt can get trapped underneath, leading to infection or fungus.
Every time you peel gel polish off, you’re taking the top layers of your natural nail with it. Do this a few times, and you end up with thin, chalky, white-patched nails that take months to grow out.
10. Use the Foil-Wrap Acetone Method for Safe Removal
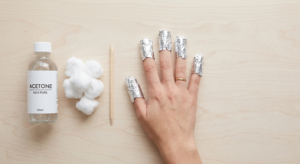
Soak a cotton ball in acetone and apply it to your nails by wrapping small pieces of aluminum foil around your fingertips. After about 15 minutes, the gel polish should come right off.
The key here is patience; let the acetone do the work. Don’t force the gel off if it’s not ready. Gently push with a cuticle stick, and if it’s resisting, soak for another five minutes.
When done properly, gel polish should come off easily with just acetone. If you’re scraping hard, you’re going too soon.
11. Moisturize Immediately After Every Removal
Acetone is necessary for gel removal, but it’s also deeply drying. The moment you’re done, apply cuticle oil to every nail and follow with a generous layer of hand cream. This step is non-negotiable; skipping it is one of the fastest ways to develop brittle, peeling nails between gel sets.
Between Appointments: How to Keep Natural Nails Healthy
This section is where most people fall short. The appointment itself is the easy part, it’s the six to twenty-one days in between that really determine whether your natural nails stay strong or gradually thin out.
12. Take a Polish-Free Break Every Few Months
Dermatologists recommend taking a nail polish holiday, try not to wear nail polish for one to two weeks or longer. This gives the nail plate time to recover fully, lets you properly assess whether any thinning or damage has occurred underneath, and allows nourishing oils and treatments to absorb directly without a barrier blocking them.
During this break, look at your natural nails honestly. If they’re noticeably thinner, more flexible than they used to be, or have white chalky patches, that’s your signal to slow down on gel frequency and prioritize repair.
Think of it as a reset, not a setback. Your nails will come back stronger for it.
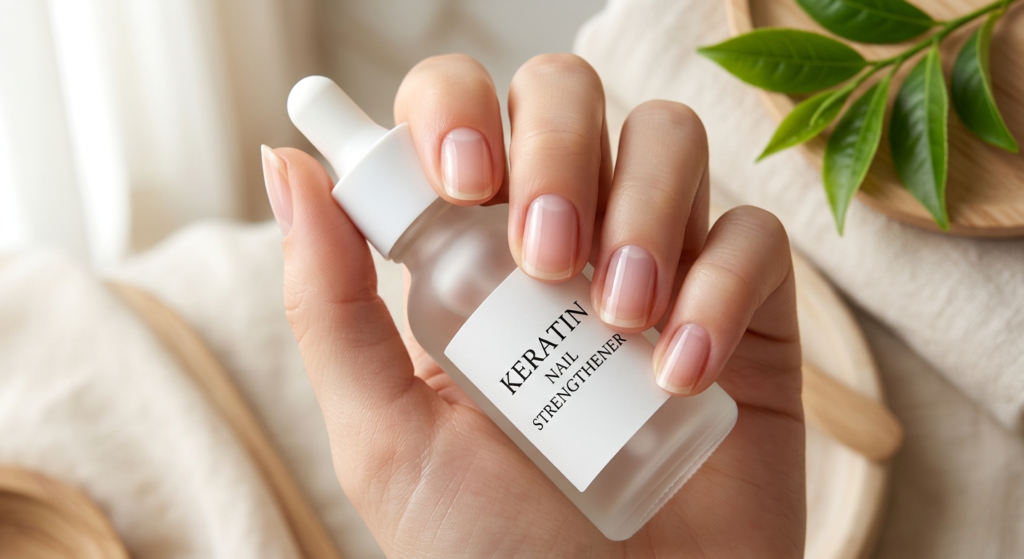
13. Use a Strengthening Treatment During the Break
During your polish-free period, don’t just leave nails bare and hope for the best. Apply a protein-based strengthening treatment or a conditioning base coat every two to three days. Look for formulas containing hydrolyzed keratin, calcium, or collagen — these actively rebuild the nail plate rather than just sitting on top of it.
Apply cuticle oil twice daily during this window. Without gel acting as a barrier, the oil absorbs directly into the nail, which means the recovery happens significantly faster than most people expect.
14. Schedule Fills Every Two to Three Weeks
As your natural nail grows, a gap appears between the cuticle and the gel extension. This gap is a structural weak point, and a health one. Lifting creates a pocket where moisture and bacteria sit directly against your natural nail, which is exactly how fungal infections and green nail syndrome start.
Regular refills every two to three weeks close that gap before problems develop. Don’t stretch fills beyond three weeks, hoping the polish will hold. The small amount of money you save absolutely isn’t worth the damage or the infection risk.
Common Gel Nail Problems — Quick Fix Table
| Problem | Cause | Fix |
|---|---|---|
| Lifting at edges | Water exposure, oil residue before application | Dry thoroughly daily, wear gloves |
| Chipping within days | Poor prep, thin layers, no top coat | Clean nails before appointment, reapply top coat |
| Thin, white nails after removal | Peeling instead of soaking | Always use foil-wrap method |
| Yellowing under gel | Pigmented polish, no base coat | Base coat every time, no exceptions |
| Itching or redness | Gel allergy or skin contact during curing | See a dermatologist, try a different gel formula |
Frequently Asked Questions
How long do gel nails last with proper care?
Typically two to three weeks. With the right aftercare habits, daily cuticle oil, gloves for cleaning, no peeling, some people comfortably reach three weeks before needing a refill or a new set.
Can I do gel nail aftercare at home between salon visits?
Absolutely. Daily cuticle oil, wearing gloves for chores, avoiding acetone-based products, and keeping your nails dry are all things you control completely at home. These habits matter more than any salon treatment between visits.
Why do my gel nails keep lifting?
The most common causes are oil or moisture on the nail before application, water exposure too soon after the appointment, or skipping the dry-down period after washing hands. See tips #1 and #4 above.
Is it okay to file gel nails at home?
Yes, gently. Use a fine-grit file to smooth any snags or minor chips. Never use a coarse file on gel, and never file down to the natural nail. If there’s significant damage, book an appointment rather than trying to fix it yourself.
How do I know if my nails are damaged from gel?
The signs are thin, peeling, or white-patched nails after removal. Mild damage recovers with proper care in four to six weeks. If you notice pain, unusual color, or the nail separating from the bed, see a dermatologist.
Final Thoughts

Gel nails can be completely healthy or quietly damaging. The difference comes down almost entirely to how you care for them, not the product itself.
Prep your nails properly before each appointment. Apply cuticle oil every single day. Wear gloves. And above all, never peel. Remove gel the right way, every time, and your natural nails will stay strong through years of gel use.
These gel nail care tips give you everything you need to enjoy beautiful, long-lasting manicures without sacrificing the health of your natural nails underneath.
New to nail care? Start with the fundamentals — read our [Best Nail Care Tips guide](#) for the daily habits that make every manicure last longer.

1 thought on “Gel Nail Care Tips for Long-Lasting, Healthy Nails”