

Acrylic nail care tips often highlight how incredible these enhancements look—long, strong, and perfectly shaped, they provide the kind of nails most people can’t grow naturally. However, there is a side to the story rarely discussed at the salon: while the surface looks flawless, the natural nail underneath is quietly paying the price.
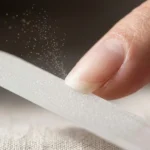
To get acrylic nails to stick, the surface of your natural nails must be filed until they feel rough. This thins your natural nails and makes them weaker before the first coat even goes on. In fact, repeated acrylic use can cause a condition called “worn-down nail syndrome”, characterised by progressive nail plate thinning that doesn’t reverse on its own without a proper break. Add improper aftercare, skipped fills, and a bad removal, and you end up with nails so thin they bend, peel, and hurt just from daily use.
The good news? This is completely avoidable. These acrylic nail care tips, backed by dermatologists and professional nail technicians, will show you exactly how to enjoy acrylics long-term without destroying the nails underneath.
What Acrylics Actually Do to Your Natural Nails
Here’s the honest version most salon content skips.
Acrylic nails are made from a liquid monomer and a powder polymer that bond together to form a hard, durable extension over your natural nail. A full acrylic set can last three to eight weeks with proper maintenance, but that bond requires a roughed-up surface to grip, which means your nail plate gets deliberately thinned at every single application.
According to the American Academy of Dermatology, to get acrylic nails to stick, the surface of your natural nails must be filed until they feel rough, which thins your natural nails, making them weaker. Do this repeatedly without proper care in between, and you end up with nails that are structurally compromised even before the acrylics go on.
Understanding this doesn’t mean avoiding acrylics. It means caring for your natural nail with the same attention you give the artificial one on top.
Before Your Appointment: Starting Strong
1. Check Your Natural Nail Health Before Acrylic Nail Care
If your natural nails are already thin, peeling, or damaged, wait. Applying acrylics over compromised nails traps the damage underneath and makes recovery significantly harder. Give your nails two to four weeks of proper care first: daily cuticle oil, a strengthening base coat, and no polish.
A stronger foundation means the acrylics will bond better, lift less, and last longer. It also means your nails come out in better shape when you eventually remove them.
When to avoid acrylics entirely:
The AAD specifically warns that covering up brittle, soft, or damaged nails with acrylics can worsen existing nail problems, not hide them. If you currently have a fungal nail infection, an open cuticle wound, significant nail separation from the bed (onycholysis), or nails that are visibly paper-thin, skip the appointment. Applying acrylics over active damage locks bacteria in and blocks any healing. Wait until the nail is fully healthy first. No competitors mention this directly — and it’s the kind of advice that genuinely protects people.
2. Choose a Salon That Prioritises Hygiene
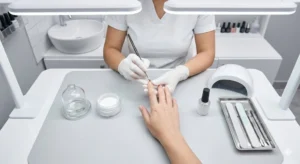
This is non-negotiable. Acrylic application involves filing the nail plate down to a roughened surface; if the tools haven’t been sterilised properly, bacteria transfer directly to a compromised nail. Before sitting down, check that your technician is using clean, sanitised tools or new ones from sealed packaging.
The quality of products matters too. High-quality acrylic powders and primers create a stronger bond and are far less likely to cause allergic reactions or irritation. Don’t be shy about asking what they use.
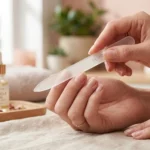
3. Ask Your Technician to File Gently
Some technicians over-buff the nail surface out of habit. If your nails feel hot, painful, or uncomfortably thin during prep, speak up immediately. If your manicurist buffs your nails so aggressively that they’re hot or painful, ask them to ease off or find a new nail technician. A good technician will always welcome feedback.
After Your Appointment: The First 48 Hours
4. Keep Nails Dry for the First 24 Hours
Fresh acrylics need time to fully cure and bond to the nail plate. Water exposure in the first 24 hours, especially prolonged soaking, can weaken that bond before it’s set, leading to early lifting at the edges.
Wash hands carefully, dry thoroughly, and avoid dishes, long showers, and swimming for the first day. This one habit significantly reduces the number one complaint people have about acrylics: premature lifting.
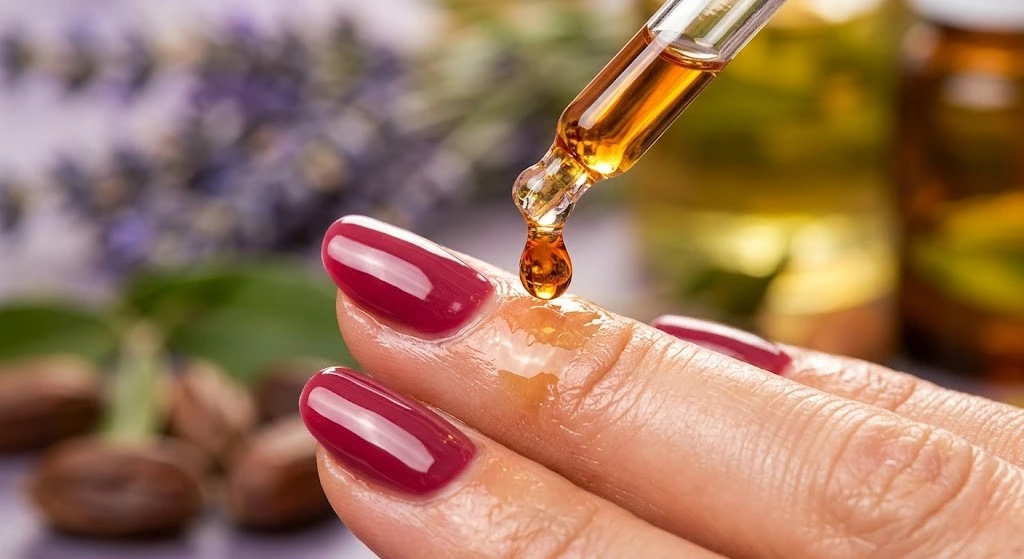
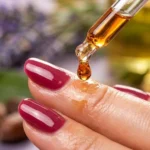
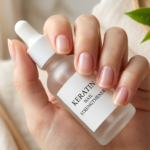
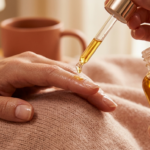
5. Apply Cuticle Oil From Day One

When acrylic nails are not moisturised frequently, they become rigid and stiff, which increases their chances of breaking. Applying two drops of cuticle oil two to three times a day keeps them more flexible and dramatically reduces cracking.
Beyond the acrylic itself, that daily oil is feeding the natural nail growing underneath. Your nail plate continues to grow beneath the extension at roughly 1/8 inch per month, keeping it moisturised means it comes out healthier when the acrylics eventually come off.
During the Wear Period: Daily Habits That Protect Everything
6. Wear Gloves for Every Water and Chemical Exposure
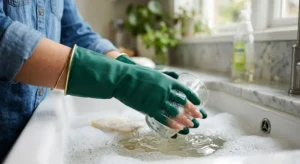
Water weakens the acrylic bond over time. When doing house chores, wearing waterproof gloves helps keep nails dry and prevents them from chipping. This applies to dishes, cleaning products, and gardening, anything involving prolonged hand exposure to liquids or harsh chemicals.
The gap that forms as your natural nail grows is also a vulnerability. Moisture trapped in that gap creates exactly the environment bacteria and fungi need to thrive. Gloves close that risk down almost entirely.
7. Never Use Acrylic Nails as Tools
This is the single most common cause of acrylic breakage and natural nail damage. Using nails to open packages, pry things, or scratch surfaces puts sudden lateral stress on the extension that the bond simply isn’t designed to handle.
When an acrylic breaks under force, it rarely breaks cleanly. It often takes a portion of the natural nail with it. Use the pad of your finger, a coin, or an actual tool. Every single time.
8. Clean Under the Nail Extension Regularly
As your natural nail grows, the gap near the cuticle becomes a collection point for dirt, soap residue, and moisture. Use a soft nail brush and mild soap to gently clean underneath acrylic nails daily. Avoid using sharp tools, which could break the acrylic or injure your natural nail.
This takes under a minute during your regular handwash and dramatically reduces the risk of infection building up silently underneath.
Fills: The Most Important Maintenance Step
9. Get Fills Every Two to Three Weeks, Without Fail
As your natural nail grows, a visible gap appears between the cuticle and the acrylic. Scheduling refills every two to three weeks prevents gaps and lifting that can look unappealing and risk serious damage to the natural nail.
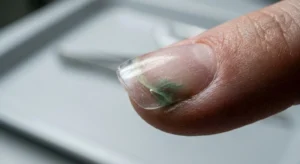
Lifting creates a pocket where moisture sits directly against your thinned natural nail, which is precisely how green nail syndrome develops. This is a bacterial infection caused by *Pseudomonas aeruginosa*, a microorganism that thrives in moist, trapped environments. Once it colonises the space under a lifted acrylic, it produces green and blue-yellow pigments that stain the nail plate. Green nail syndrome won’t clear up on its own; it requires full acrylic removal, a proper rest period, and in most cases, a visit to a dermatologist for topical or oral antibiotics.
Prevention is far simpler: get fills on time, keep nails dry, and never ignore early lifting. Don’t stretch fills to four weeks to save money; the treatment for an infection costs far more in time, money, and nail health than any fill appointment.
10. Get a Fresh Full Set Every Three to Five Fills
A full removal and reapplication every three to five fills gives both you and your technician a clear view of the natural nail underneath. It’s the only time you’ll properly see whether the nail is maintaining its health or quietly thinning with each cycle.
Use this as your regular health check. If the natural nail looks noticeably thinner or more damaged each time, take a break and let it fully recover before the next set.
Removal: Where Most Damage Actually Happens
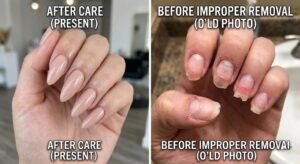
11. Never Peel, Force, or Bite Off Acrylics
This is the most important rule in all of acrylic nail care, and the most broken.
Forcefully removing acrylics physically tears off the top layers of your natural nail. Do it once, and you’ll see the white, chalky, painfully thin patches left behind. Do it repeatedly, and those patches take six months or more to grow out. Never peel off artificial nails, not even when they’re already lifting significantly. Always use the proper soak-off method or book a professional removal.
12. Use the Acetone Soak Method for Safe Removal

Fill a bowl with acetone, submerge your fingertips, and soak for 15 to 20 minutes. The acrylic will soften and can then be gently pushed off with a cuticle stick. If it’s resisting, soak for another five minutes. Don’t force it.
Patience during removal is what separates a nail plate that bounces back in weeks from one that takes months to recover. If you’re pushing hard, you’re not ready yet.
13. Give Nails a Recovery Week After Every Removal
After removing the acrylics, wait at least one week, ideally two, before applying a new set. Apply cuticle oil twice daily during this window, use a protein-based strengthening treatment, and let the nail plate begin rebuilding without anything on top of it.
After removing fake nails, moisturise your nails and cuticles completely so hydration gets restored. This short recovery period is what makes long-term acrylic use genuinely sustainable.
Common Acrylic Nail Problems, Quick Fix Table
| Problem | Cause | Fix |
|---|---|---|
| Lifting at edges | Moisture before application or water exposure | Keep nails dry for the first 24 hours, and wear gloves |
| Acrylic cracking or breaking | Used as tools, the length is too long for a lifestyle | Shorter length, stop using them as tools |
| Green discolouration under the nail | Bacteria trapped in a lifted gap | See a nail tech or dermatologist immediately |
| Thin, painful nails after removal | Peeling instead of soaking | Always use acetone soak — no exceptions |
| Cuticle dryness and cracking | Skipping daily oil | Cuticle oil twice daily, every single day |
Frequently Asked Questions
How often should I get acrylic nail fills?
Every two to three weeks. Beyond three weeks, the growth gap becomes a significant risk of lifting and infection. Regular fills are the single most important acrylic nail maintenance habit, more than any product you use at home.
Can I do acrylic nail aftercare at home?
Absolutely, and you should. Daily cuticle oil, gloves during cleaning, gentle cleaning under the extension, and avoiding using nails as tools are all home habits that determine how healthy your natural nails stay throughout your acrylic use.
How do I know if acrylics are damaging my natural nails?
Signs include nails that feel noticeably thinner after removal, white chalky patches, unusual flexibility, or sensitivity. If you notice these, take a full break from acrylics until the nail grows out completely before starting again.
Is it safe to wear acrylics long-term?
Yes, with proper care. The key is regular fills, professional removal, daily moisturising, and periodic breaks to assess your natural nail health. Acrylics become a problem when care is neglected, not simply from wear duration.
What should I do during a break from acrylics?
Apply a strengthening base coat every two to three days, use cuticle oil twice daily, and give the nail plate at least four to six weeks to recover before your next set. A biotin supplement during this period can support faster, stronger regrowth.
Final Thoughts on Proper Acrylic Nail Care
Acrylics and healthy natural nails are not opposites; they just require more intentional care than most people give them.
Prep well. Moisturise every day. Wear gloves. Get fills on time. And above all, always remove properly. Do these consistently, and your natural nails can stay genuinely healthy through years of acrylic use.
These acrylic nail care tips give you everything you need to enjoy the look you love without paying for it with your nail health.
Thinking about switching to gel? The AAD actually recommends gel as a gentler alternative; it’s more flexible, less likely to crack your natural nail, and easier on the nail plate overall. Read our [Gel Nail Care Tips guide](#) to see if it’s the right move for you.

1 thought on “Acrylic Nail Care: Keep Your Natural Nails Healthy”