Based on guidance from Dr. Shari Lipner, MD, PhD, FAAD, Director of the Nail Division at Weill Cornell Medical Center, and the American Academy of Dermatology.
Quick Summary: Safe Gel Removal
Time: 25-30 minutes
Cost: $15-25 in supplies
Method: File top coat → Acetone soak 10-15 min → Gentle removal → Hydrate
✅ Works for regular gel polish
❌ Won’t work for hard gel (needs professional filing)
How to remove gel nail polish at home safely is a common question for many. You should never peel off your gel nails because it hurts them. Peeling makes your nails thin and weak. Instead, use this easy way to remove gel without any damage.
Peeling gel polish rips off layers of your natural nail, leaving them paper-thin and weak. But here’s good news: you can safely remove gel at home in 25-30 minutes using a dermatologist-approved method—no salon needed.
I’ve worked with gel nails for over 15 years, and I’ll show you exactly how the experts recommend doing it.
Watch the Professional Method in Action
To ensure you are performing this process with precision, it is helpful to see a demonstration by a world-class professional. In the tutorial below, celebrity manicurist Tom Bachik—who manages the nails of stars like Jennifer Lopez and Selena Gomez—demonstrates his professional technique for removing gel polish safely. Watching his gentle approach will help you master the movements required to protect your natural nail bed.
What Dermatologists Say About Gel Removal
Dr. Shari Lipner, MD, PhD, FAAD (Director of the Nail Division at Weill Cornell Medical Center), states that acetone offers the most effective way to remove gel polish at home. However, the method matters significantly.
Why peeling is so damaging:
When you peel gel polish, you tear away layers of your natural nail plate. Each peel removes 1-3 layers, and your nails are only about 100 layers thick total. Recovery takes 3-6 months—the time for complete nail regrowth.
However, Dr. Lipner emphasizes that while acetone may sound harsh, picking or filing off gel polish can significantly damage your nails and cause white spots. The acetone soak method, when done correctly, is actually safer for your nails.
Know Your Gel Type
Different gels need different approaches:
| Gel Type | Can Soak Off? | Time Needed |
| Regular gel polish | Yes | 10-15 min |
| Builder gel/BIAB | Yes (file first) | 15-20 min |
| Hard gel | No | See professional |
If you’re unsure what type you have, assume it’s regular gel and try the acetone method below.
What You’ll Need
Essential supplies:
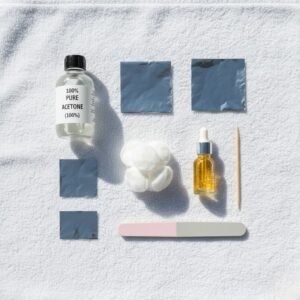
- 100% pure acetone (NOT regular nail polish remover)
- Cotton balls or pads
- Plastic food wrap or aluminum foil
- 180-grit nail file
- Cuticle pusher or orange wood stick
- Petroleum jelly
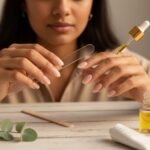
- Cuticle oil
- Timer
Optional: Reusable gel removal clips ($8-15) make this easier—they hold acetone pads in place without foil wrestling.
Where to buy: Beauty supply stores sell pure acetone for $5-8. Drugstore “acetone remover” is often diluted and won’t work as well.
The 10-Step Dermatologist-Approved Method
Step 1: Protect Your Workspace (1 min)
First, lay down an old towel or plastic sheet. Acetone can damage wood and laminate surfaces.
Safety note: Work in a well-ventilated area—open a window or turn on a fan.
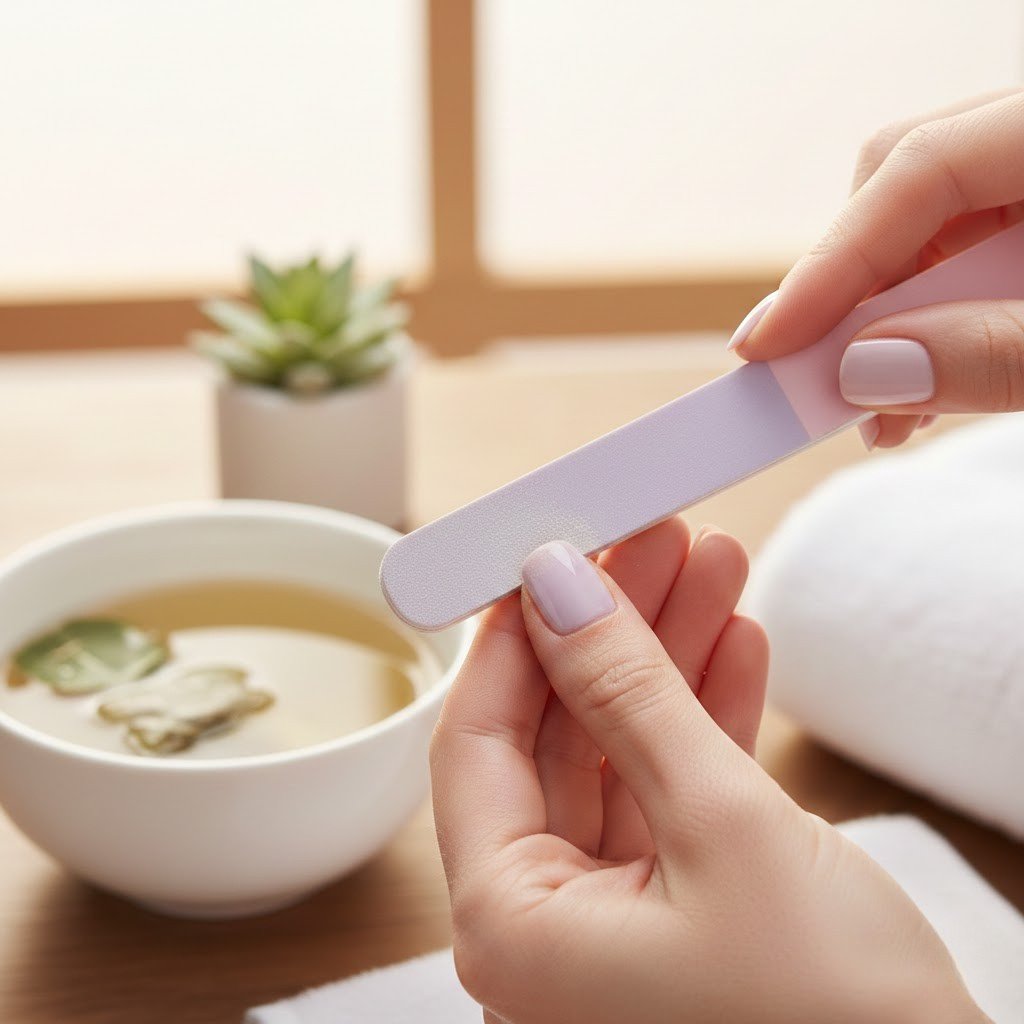
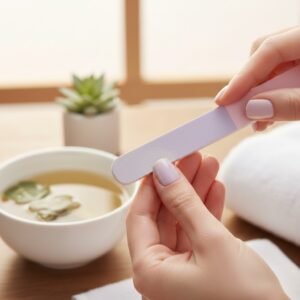
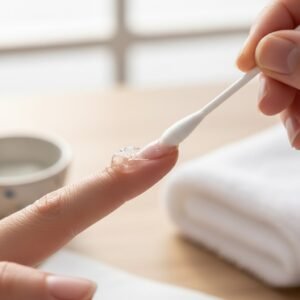
Step 2: File Off the Top Coat (5 min)
Using your 180-grit file, gently file each nail surface until completely matte—no shine.
Technique: File side to side in one direction. Keep the file parallel to your nail surface. You’re breaking the seal, not reshaping your nail.
Why it matters: The top coat is impermeable. Without filing, acetone can’t penetrate, even with extended soaking.
Step 3: Apply Skin Protection (2 min)
Apply a thin layer of petroleum jelly to each cuticle and surrounding skin. This creates a protective barrier against acetone’s drying effects.
Pro tip: Be generous around the entire nail perimeter.
Step 4: Prep Cotton to Nail Size (2 min)
Cut cotton into nail-sized pieces. The American Academy of Dermatology recommends this to minimize skin contact with acetone.
Sizing guide:
- Pinkie nails: ¼ cotton ball
- Other nails: ½ cotton ball
Cotton should cover your nail but not extend far beyond it. When acetone sits on skin, it causes irritation and dryness.
Step 5: Soak and Wrap Each Nail (3 min)
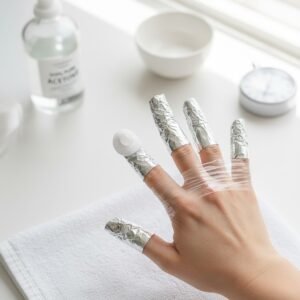
Next, saturate each cotton piece with 100% pure acetone until damp but not dripping.
Place soaked cotton on your nail.
Dr. Lipner’s recommendation: Use plastic food wrap instead of foil. Plastic creates a tighter seal, so acetone is less likely to drip. Wrap tightly around your fingertip with the cotton pressed against the nail.
Work on one hand at a time so you have a free hand to remove wraps.
If using foil: Cut 3×3-inch squares and wrap similarly, ensuring a tight seal.
Step 6: Wait 10-15 Minutes (Add Heat to Speed Up)
Set a timer for 10 minutes (regular gel) or 15 minutes (builder gel).
Speed hack: Wrap your covered fingertips in a warm towel. The gentle heat helps acetone penetrate faster, cutting time by 2-3 minutes.
Step 7: Check and Remove Wraps (1 min)
Starting with the first nail wrapped, gently twist and remove the wrap.
Ready to remove if gel looks:
- Cracked or bubbled
- Gummy and soft
- Some gel is already on the cotton
Needs more time if gel:
- Looks unchanged or shiny
- Feels rock-hard
- No residue on cotton
If not ready, rewrap and soak for 5 more minutes.
Step 8: Gently Push Off Softened Gel (5 min)
Using your cuticle pusher, gently slide softened gel off your nail—always push from the cuticle toward the tip.
Critical safety: Dr. Lipner cautions against aggressive use of tools, as this can injure your nails and cause white spots. The gel should slide off easily.
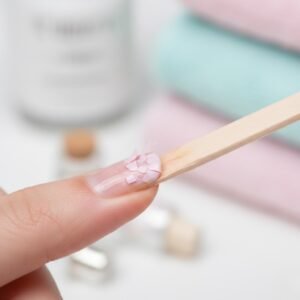
For stubborn spots: Run a washcloth under warm water and gently rub the nail only (not surrounding skin). This warm washcloth technique is gentler than dry buffing and prevents nail trauma.
Step 9: Clean and Smooth (2 min)
Wash your hands with gentle soap to remove acetone residue. Use fragrance-free soap if available.
Finally, if slight roughness remains, very lightly buff with a fine buffer. Don’t over-buff trying to make nails shiny—just smooth the surface.
Step 10: Intensive Hydration (Ongoing)
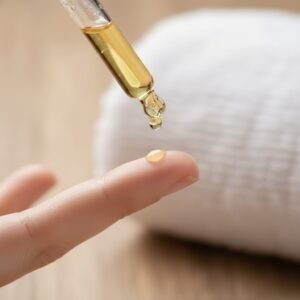
Massage cuticle oil into each nail andthe surrounding skin immediately.
Critical for nail health: Apply cuticle oil daily for 7 days to help reduce irritation from acetone and restore moisture. This prevents brittleness and breakage.
When Gel Won’t Come Off: Troubleshooting
Problem: Gel unchanged after 15 minutes
Solution: It’s likely a hard gel (can’t soak off). See a professional with e-file training.
Problem: Gel softening, but won’t push off
Solution: The top coat wasn’t filed enough. Refile thoroughly, especially the center, then resoak for 10 minutes.
Problem: Using “100% acetone” but not working
Solution: Some drugstore products are diluted. Buy from a beauty supply store—check the ingredient list shows only “Acetone (100%).”
Problem: Edges lift, but the center won’t budge
Solution: File the center specifically, then rewrap just that area for another 5-10 minutes.
5 Mistakes That Damage Your Nails
1. Peeling or Picking at Lifting Gel
The damage: Tears off layers of your natural nail, causing thinning and weakness.
The fix: If gel starts lifting, remove it properly within 2-3 days. Apply regular polish over lifting areas to prevent snagging.
2. Skipping the Top Coat Filing
Why it fails: The gel top coat is chemically designed to be impermeable—acetone literally cannot penetrate it.
The fix: File until every bit of shine is gone. The surface should look completely matte before you soak.
3. Rushing the Soak Time
The result: Gel won’t be soft enough, leading to aggressive scraping and nail damage.
The fix: Set a timer and wait the full time. Don’t check early “just to see”—each unwrap and rewrap loses heat and increases acetone evaporation.
4. Using Metal Tools to Scrape
The damage: Creates grooves and white trauma spots on the nail plate.
The fix: Use only wooden or plastic cuticle pushers. If gel isn’t sliding off with gentle pressure, it needs more soak time—never force it.
5. Skipping Post-Removal Hydration
The result: Harsh acetone can dehydrate nails, leading to dryness, weakness, and potential discoloration.
The fix: Apply cuticle oil immediately and daily for 7 days minimum. This isn’t optional—it’s essential for nail health.
How to Tell If Your Nails Are Damaged
Healthy nails after removal:
- Smooth surface, no ridges
- Natural pink color
- Firm but slightly flexible
- No white spots or pain
Signs of damage:
- Paper-thin, overly flexible
- White spots (scraping trauma)
- Vertical ridges (over-filling)
- Peeling layers
- Yellowing or pain
Quick Recovery Plan
If your nails show damage:
Weeks 1-2: No polish, cuticle oil 2-3x daily, keep nails trimmed short
Weeks 3-4: Continue oil, can add nail strengthener (like OPI Nail Envy)
Week 5+: Try regular polish only (not gel), wait 2-3 months before returning to gel
Important: Dr. Lipner notes it takes 6 months to fully grow out fingernails, 12-18 months for toenails. Damaged nails must literally grow out—there’s no way to repair them faster.
FAQ: Your Questions Answered
How long does it take to remove gel nail polish?
The complete process takes 25-30 minutes: filing (5 min), soaking (10-15 min), removal (5-10 min), and aftercare (5 min). Thick applications may need 35-40 minutes.
Can you remove gel polish without acetone?
Yes, but it’s less effective. Acetone-free removers work for some brands (slower), and peel-off base coats work if applied beforehand. Acetone remains the most reliable method for most situations.
Why won’t my gel polish come off?
Common reasons: (1) It’s a hard gel that can’t soak off, (2) the top coat wasn’t filed properly, (3) Insufficient soak time, or (4) Weak/diluted acetone. Try refilling thoroughly and soaking another 10 minutes with pure acetone.
Is it bad to peel off gel nail polish?
Yes—extremely bad. Peeling removes layers of your natural nail along with the gel, causing thinning, weakness, and painful sensitivity. Recovery takes months as the damaged nail grows out. Always remove properly with acetone.
Can I use this method on toenails?
Yes! The process is identical. The only difference: toenails may need 15-20 minutes soak time because toenail plates are often thicker. Work on one foot at a time so you can walk if needed.
What if I don’t have 100% acetone?
Regular nail polish remover won’t work effectively—it’s too diluted and takes 30+ minutes with poor results. Buy pure acetone from any drugstore beauty section or beauty supply store ($5-8 for 16 oz).
How long should I wait between gel manicures?
Minimum 3-7 days for recovery. Ideally, wait 1 week between applications. If nails are damaged, wait 2-4 weeks or until they feel strong. Dermatologists recommend limiting gel to a few times per year to minimize cumulative nail damage.
Will acetone damage my nails permanently?
No. While acetone temporarily dehydrates nails, this effect reverses with proper hydration. Temporary dryness resolves within 24-48 hours using cuticle oil and moisturizer. What causes permanent damage is peeling or aggressive scraping—not the acetone itself.
Why do my nails feel soft after removal?
This is normal. Gel polish reduces water passage through nails by 50%. When removed, nails temporarily feel softer as they rehydrate. They’ll return to normal firmness within 24 hours with proper moisturizing.
The Bottom Line
Removing gel polish safely comes down to three things:
- File that top coat until completely matte
- Soak with 100% acetone for 10-15 minutes (don’t rush)
- Be gentle when pushing off softened gel—never force it
Never peel, never scrape aggressively, and always hydrate afterward.
According to dermatology experts, you can enjoy gel manicures safely—the key is proper removal technique. Your nails can stay healthy and beautiful through countless gel applications when you remove them the right way.
Quick recap: File top coat → Protect skin → Soak 10-15 min → Push off gently → Buff smooth → Hydrate daily for 7 days
Medical Disclaimer: This article provides general information based on dermatological research and expert recommendations. For specific concerns about nail health, consult a board-certified dermatologist.
Article references guidance from Dr. Shari Lipner, MD, PhD, FAAD (Weill Cornell Medical Center) and the American Academy of Dermatology.
Last updated: January 2026 |