
Want to learn how to do acrylic nails? Acrylic nails can add style and flair to your look.
Acrylic nails are a popular choice for many who want long-lasting, stylish nails. These nails are durable and can be shaped in many ways. Learning how to do acrylic nails at home can save money and time. To achieve excellent outcomes, you don’t have to be an expert.
With the right tools and some practice, you can achieve salon-quality nails. This guide will walk you through the steps. From preparing your natural nails to applying the acrylic, we cover it all. Ready to get started? Let’s dive into the world of acrylic nails.
Introduction To Acrylic Nails
Applying a mixture of liquid and powder on your natural nails is the process of creating artificial nails. This process results in strong and durable extensions.
Overview of Acrylic Nails
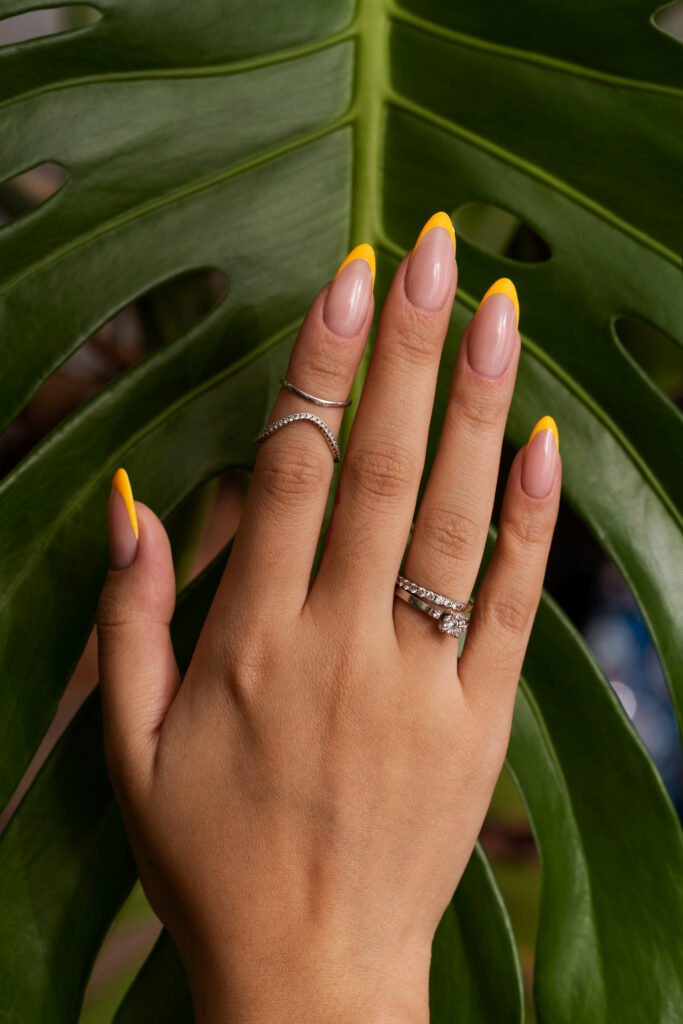
Acrylic nails have become super popular in the beauty world. They’re a great choice if you want strong, long-lasting, and stylish nails. If you’ve ever admired someone’s perfect nails, they were probably acrylics!
What are Acrylic Nails?
Acrylic nails are made by mixing a liquid (monomer) and a powder (polymer). This forms a hard layer on top of your natural nails. They come in many shapes and lengths—like square, oval, or coffin—and can be customized with any color or design you like.
Benefits of Acrylic Nails
Acrylic nails aren’t just pretty—they’re also practical:
-
Long-Lasting: They’re very strong and can last weeks without chipping.
-
Custom Style: You can choose from simple to bold designs, whatever suits your style.
-
Protection: If your natural nails are weak or broken, acrylics can protect them while they grow.
When I got my first set of acrylics, I was surprised by how strong and long-lasting they were. I didn’t have to worry about chipped polish or broken nails anymore. If you want beautiful nails that stay perfect for weeks, acrylics are worth trying!
Essential Tools And Materials
Creating stunning acrylic nails starts with having the right tools and materials. Without the essentials, achieving a professional look can be challenging. Let’s break down what you need to ensure your acrylic nails are salon-quality.
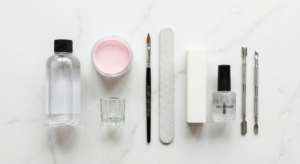
Basic Tools Needed
First things first, you need the basic tools. These serve as the foundation for your acrylic nail kit.
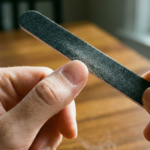
- Nail File: For shaping your nails, a quality nail file is essential.
- Buffer: Buffers smooth out the nail surface for a polished look.
- Cuticle Pusher: Push back your cuticles to make room for the acrylic.
- Nail Clippers: Cut your nails to the length you want.
- Brush: Smoothly apply the acrylic using a high-quality brush.
It will go more smoothly and effectively if these tools are available.
Choosing The Right Acrylic Products
Now, let’s talk about choosing the right acrylic products. Not all acrylics are created equal.
Start with liquid monomer. This is the liquid that you mix with the acrylic powder. Ensure it’s of high quality to avoid lifting and peeling.
There are several colors and finishes available for the acrylic powder. Select the one that best fits your preferences and style.
Don’t forget the primer. A good primer prepares the nail surface for the acrylic, ensuring better adhesion.
Lastly, a top coat is essential. It seals the acrylic and adds shine, making your nails look fantastic.
With the right products, your nails will look stunning and last longer.
Now, a quick question for you: Have you ever tried acrylic nails at home before? If so, what challenges did you face, and how did you overcome them?
By having these essential tools and materials, you’re well on your way to perfecting your acrylic nails. Happy nail crafting!
Preparing Your Natural Nails
Before you begin applying acrylic nails, it’s vital to prepare your natural nails properly. This step ensures the acrylic adheres well and lasts longer. It also helps maintain the health of your natural nails. Below are some essential steps for preparing your nails.
Cleaning And Shaping
Start by cleaning your nails thoroughly. Remove any old nail polish with a gentle nail polish remover. Wash your hands with soap and water to remove any oils and dirt. Dry your hands completely.
After that, shape your nails using a nail file. Select a form, such as square, round, or almond, that fits your style. To keep your nails from becoming damaged, only file in one direction. Smooth out any rough edges with a buffer.
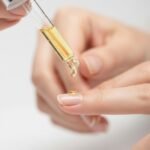
Cuticle Care
Spend a few minutes soaking your hands in warm water. The cuticles become softer and simpler to deal with as a result. Use a cuticle pusher to gently press your cuticles back. Take care not to harm the sensitive skin.
If necessary, trim any excess cuticle skin with cuticle nippers. Always be gentle to avoid injury. Finish by applying a cuticle oil to keep the area moisturized. This step helps keep your nails healthy and strong.
Applying Acrylic Nails
The process of applying acrylic nails may be enjoyable and fulfilling. It’s a fantastic opportunity to showcase your artistic side and get salon-caliber results without leaving the comforts of your home.
Whether you’re a beginner or have some experience, this guide will walk you through the essential steps to get those perfect acrylic nails.
Priming The Nails
First, ensure your nails are clean and dry. Remove any old polish with a non-acetone polish remover. To get the form you want, trim and file your nails.
Next, use a cuticle pusher to gently push your cuticles back. A smooth application surface is ensured in part by this process. Buff your nails lightly to remove any shine. This helps the acrylic adhere better. Use a nail dehydrator to remove oils from the surface of your nails. This step is crucial for preventing lifting.
Applying The Acrylic
Begin by applying a thin layer of acrylic primer to each nail. This ensures the acrylic adheres well and lasts longer. Allow the primer to dry completely.
After that, dip your acrylic brush into the monomer liquid. Wipe off any excess fluid on the side of the dappen dish. Dip the brush into the acrylic powder to form a small bead.
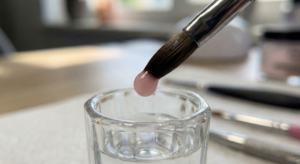
To prevent flooding the cuticle, place the bead close to the cuticle region but not too close. Use the brush to gently pat and spread the acrylic towards the tip of the nail. Smooth and shape the acrylic as you go.
Work quickly but carefully, as the acrylic begins to harden after a few minutes. Repeat this process for each nail, ensuring an even and smooth application.
Once all nails are done, allow the acrylic to fully harden. Typically, this takes ten to fifteen minutes. You can test by tapping the nail lightly; it should feel hard and make a clicking sound.
Shape and file the nails to your desired finish. Buff the nails to remove any bumps and to achieve a smooth surface.
Finally, apply your favorite nail polish or top coat. Enjoy your beautiful new acrylic nails!
Have you ever tried doing your own acrylic nails? Which hints or techniques have you found useful?
Shaping And Filing Acrylics
Shaping and filing acrylic nails are key steps in achieving a flawless manicure. Proper shaping enhances the nail’s appearance and ensures durability. Filing smooths the edges, preventing snagging or breaking. Let’s explore the best techniques for shaping and filing acrylics.
Shaping Techniques
First, choose a nail shape that suits your fingers. Popular shapes include square, oval, and stiletto. To get rid of extra acrylic, start with a coarse file. Hold the file at a slight angle for better control. To make a square, file straight across the tip.
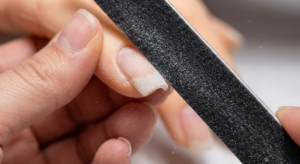
For an oval, use a curved motion along the edges. To prevent splitting, keep in mind to file in a single direction. Consistent pressure ensures an even shape.
Filing Tips
Use a finer-grit file to smooth the edges. This prevents rough spots. Avoid filing too close to the cuticle. It can cause lifting. For a smooth finish, hold the file parallel to the nail. Buff the surface with a buffer block for a shiny look. Clean the nails with a brush to remove dust. To nourish the skin around the nails, use cuticle oil.
This keeps them healthy.
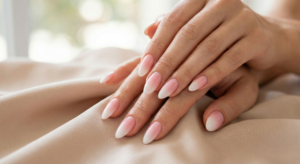
Polishing And Decorating
Polishing and decorating your acrylic nails can transform their appearance. This step allows for creativity and personalization. From choosing the right polish to adding unique nail art, each decision impacts your final look. Let’s explore how to polish and decorate your acrylic nails.
Applying Polish
Start by choosing a nail polish color. Pick a shade that complements your style. Shake the polish bottle gently to mix the color. On each nail, apply a little layer of base paint. This preserves your nails and improves the polish’s adhesion. Allow the base coat to dry completely.
Then, apply the initial coat of the color of your choice. Use three strokes: one in the middle and one on each side. Keep the layer thin to avoid bubbles. Let it dry for a few minutes. To obtain complete coverage, apply a second layer. Again, let it dry completely.
Finally, apply a top coat. This seals the color and adds shine. It also helps the polish last longer. Make sure to let your nails dry fully before touching anything.
Adding Nail Art
Nail art adds a unique touch to your acrylic nails. You can use various tools like dotting tools, brushes, or stickers. Start simple if you are new to nail art. Dots, stripes, and simple patterns are easy to create. Use a thin brush for more detailed designs.

Apply nail art only after your polish is completely dry. This prevents smudging. You can use different colors to make your designs pop.Once finished, let the nail art dry. Seal it with another layer of top coat. This protects your artwork and keeps it looking fresh.
Experiment with different designs. Be creative and have fun. Your nails are a canvas for your unique style.
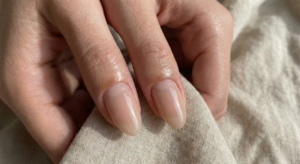
Maintenance And Care
Taking care of your acrylic nails helps them look great and last longer. It also helps prevent problems like lifting and breaking.
Daily Care Tips
-
Keep your nails dry and clean. Too much water can make the nails lift. Dry your hands well after washing.
-
Wear gloves when doing chores. Cleaning products can damage your nails. Gloves protect them from harsh chemicals.
-
Use cuticle oil every day. This keeps your cuticles healthy, which helps your nails stay strong.
-
Don’t use your nails as tools. Avoid using them to open things or scratch surfaces, as this can cause them to chip or break.
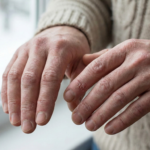
Handling Lifting
If a nail starts to lift, don’t pick at it—it can make it worse.
-
Try using nail glue to fix small lifted areas. Clean the spot, apply a little glue, and press it down gently.
-
If the lifting is bad, go to your nail technician. They can repair it the right way.
-
Regular nail appointments (every 2–3 weeks) help keep your acrylic nails in great shape and prevent problems.
Removing Acrylic Nails
Removing acrylic nails can be tricky. It’s important to do it safely. This keeps your natural nails from becoming damaged. Let’s explore some safe methods and post-removal care tips.
Safe Removal Methods
One popular technique is to soak your nails in acetone. First, file the top layer of your nails. Use a coarse nail file for this. Then, soak a cotton ball in acetone. Wrap it in foil after placing it on your nail. Wait 20 to 30 minutes. The acrylic should soften and come off easily.
Another method is using a nail removal kit. These kits are available in stores. They contain everything you need. For optimal results, adhere to the kit’s instructions.
Avoid peeling or pulling off the acrylic. This can harm your natural nails. If you’re unsure, visit a professional nail technician. They can remove the acrylic safely.
Post-removal Care
You must take care of your natural nails after getting fake nails removed. Start by moisturizing your nails and cuticles. Use a good nail oil or cream. This helps them stay healthy.
Consider using a nail strengthener. This can help rebuild your nails. Look for one with vitamins and minerals.
Keep your nails short until they regain strength. Trim them regularly and avoid nail polish for a while. This gives your nails a break and lets them breathe. Remember to hydrate your nails daily. Healthy nails require consistent care.
Health & Safety Advisory: A Medical Perspective
Mastering how do you do acrylic nails requires adhering to strict safety standards. According to the American Academy of Dermatology (AAD), improper application techniques or poor hygiene while learning how to do acrylic nails at home step by step can result in serious infections or contact dermatitis. When using your acrylic nail set, it is vital to follow sterilization protocols recommended by health experts. While the convenience of applying acrylic nails at home is appealing, the AAD advises that if you notice persistent pain, swelling, or nail separation, you should immediately consult a board-certified dermatologist. Understanding how to do your own acrylic nails also means knowing when to seek professional medical intervention to protect your long-term nail health.
Follow these tips to keep your nails in top shape.
Frequently Asked Questions
How Do You Do Acrylic Nails Step By Step?
To do acrylic nails, prepare your nails, apply nail forms, brush on acrylic mixture, shape nails, and finish with polish.
What Will I Need To Start Doing Acrylic Nails?
You will need acrylic powder, liquid monomer, a brush, nail forms or tips, a nail file, and a dappen dish.
What Is Needed For Diy Acrylic Nails?
For DIY acrylic nails, you need acrylic powder, liquid monomer, nail forms or tips, a brush, a nail file, and a primer.
What Goes First On Acrylic Nails, Dehydrator Or Primer?
The dehydrator goes first on acrylic nails. It removes oils and moisture, ensuring better adhesion of the primer and acrylic.
Conclusion
Creating beautiful acrylic nails at home is simpler than it seems. With the right tools and patience, you can achieve salon-quality results. Remember to prep your nails properly. Practice makes perfect. Don’t rush the process. Take your time to apply the acrylic smoothly.
Enjoy the creative journey. Your nails will look stunning and professional. Share your new skills with friends. Have fun experimenting with different designs. Happy nail crafting!


2 thoughts on “How to Do Acrylic Nails: Step-by-Step Guide for Beginners”